Watermark settings
Watermarks using text and/or a picture image can be added to a report before it is exported or printed.
Text watermark
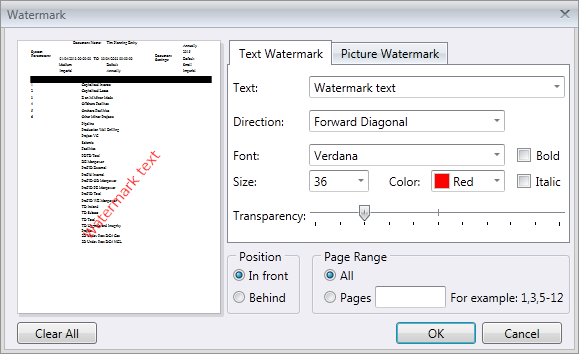
To add a text watermark:
- Click the Watermark button
 on the toolbar and the Watermark dialog will open.
 - Click the Text Watermark tab.
- Enter the waterwark text in the Text field.
- If required, specify other text properties (direction, color, font, size, transparency).
- Specify All Pages or a restricted page range for the watermark in the Page Range section of the dialog. Separate page numbers with commas, or specify page ranges using a dash.

Picture watermark
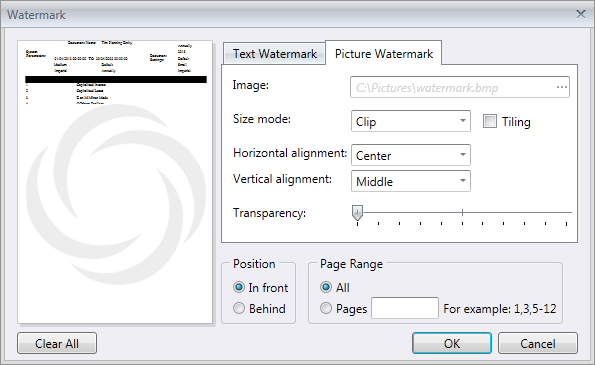
To add an image as a watermark:
- Click the Watermark button on the toolbar and the Watermark dialog will open.
- Click the Picture Watermark tab.
- Load the image and customize its properties (size mode, horizontal and vertical alignment, tiling, transparency, etc.).
- Specify All Pages or a restricted page range for the watermark in the Page Range section of the dialog. Separate page numbers with commas, or specify page ranges using a dash.

Remove a watermark
To remove watermark(s) from a report:
- Click the Watermark button
 on the toolbar and the Watermark dialog will open.
 - Click the Clear All button in the dialog. The watermark will be removed from the preview pane.
- Click OK to save changes and close the dialog.
